


How to assemble, align, and clean your pump for more comfort and milk output — plus, tips for troubleshooting, maintaining supply, and more.
When it comes to pumping, knowing how to make the most out of your session can make all the difference. That means learning how to correctly assemble and align your pump, how to master your modes, how to take care of your parts (and replace them often!), and of course, how to find the right flange and insert fit.
In this article, we’ll break it all down to set you up for more pumping success. We’ll cover:
- Preparing to use a breast pump
- Importance of finding the right flange size
- How to optimize pump positioning and alignment
- How to store and thaw your breastmilk
- Troubleshooting issues that commonly impact comfort and output
- And more!
Keep reading for expert tips from our team.
Preparing to Use a Breast Pump
Choosing the Right Pump
When selecting a breast pump, you’ll want to think through what makes the most sense for your lifestyle. Will you be pumping on-the-go or from the comfort of your home? Will you be chasing after a toddler in addition to caring for your newborn? Will you be pumping multiple times a day or only occasionally? These questions will help you decide whether a traditional pump, wearable pump, or manual (aka handheld) pump is right for you.
How to Pick a Breast Pump: Reviewing Traditional, Wearable, Passive, Manual, and Hospital-Grade
Assembling Your Pump
No matter what kind of pump you’re using, you’ll want to invest time in learning how to assemble it properly. Here’s a rundown of the parts:
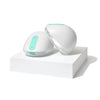
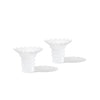
All pumps have a plastic or silicone flange (sometimes called a “breast shield”) that creates a seal around the areola to pull in the nipple and stimulate milk flow. Depending on your pump, it will either twist onto or sit inside your milk container. If you’re using an insert, this will fit inside your flange, making the fit more snug and comfortable.
Your pump will also have a duckbill (sometimes called a “valve”), which helps to create suction and extract more milk from your breast, and a diaphragm (sometimes called a “seal”), which prevents milk backflow into the pump. The duckbill will attach to your flange and carry milk to your container; the position of your diaphragm may vary depending on your pump.
You may have a few other parts to assemble based on the pump you choose to use. (For example, the Willow 360 has a part called a Flextube that allows for totally leak-proof pumping in any position.)
It’s important to make sure that all of these parts are firmly in place — otherwise, you may experience decreased suction (and less milk output) or leakage.
Creating a Comfortable Environment
Once your pump is properly assembled, you’ll want to make sure that you’ve created an environment that’s optimized for calm and comfort. Less stress means more milk production!
If you’re using a traditional pump, find a chair that’s close to the outlet and a side table that you can use to set your pump on. If you’re using a wearable pump, resist the urge to do all your pumping while multitasking — sometimes you may need to pump while emptying the dishwasher, preparing a meal, or getting some work done on your laptop, but taking real break (when you can) is so important, too.
If you’re pumping at work, remember that The PUMP Act, which was passed in 2022, gives more moms the right to pump on the job. In short, it mandates that moms need both sufficient time to pump as well as a clean and private space. It also gives them the ability to go after financial compensation if their company failed to comply with the rules. You can learn more about your pumping rights here.
Step-by-Step Guide to Correctly Using a Breast Pump
Positioning Your Flanges and Aligning Your Pump
For optimal milk flow, you’ll want to make sure that your flange is centered directly over your nipple, and that you feel no pain or discomfort while pumping. (If your nipple feels like it’s rubbing or “crashing” into the end of the flange, you’ll want to experiment with different sizes.)
Equally as important: a snug but stretchy bra that holds your pumps in place. If your bra isn’t fitted enough, the pump’s suction strength (and your output, in turn) will suffer.
Alignment - Putting Willow® Pump On
Starting Your Pump
Once you turn your pump on, you’ll want to begin pumping in stimulation mode, which is designed to stimulate your letdown reflex. This is true whether you’re pumping with a traditional or wearable pump. (If you’re pumping with the Willow Go, your pump will automatically switch to expression mode after two minutes, while the Willow 360 is built with smart sensors that adapt to your body’s natural rhythms to switch at the optimal time.)
Throughout your session, switching between modes can help trigger additional letdowns, while adjusting your pumps’ suction strength can help you achieve optimal comfort. Whatever you do, just don’t “set it and forget it” — experimenting with the right levels can make a huge difference in your output and overall pumping success.
Keep in mind: if you don’t love the idea of having to press a bunch of buttons throughout your session, look for a pump that’s app-connected and controlled and allows you to manage your session with a tap. This can make a huge difference if you’re pumping while multitasking or on-the-go — it means you don’t need to reach into your bra or deal with a clunky motor.
Observing Your Output and Keeping the Time
You’ll want to pump until you feel between 2-3 letdowns, or until 15-20 minutes have passed and your breasts feel empty. (Note that not all moms are able to feel their letdowns, so don’t worry if you don’t!) You’ll want to focus on fully removing the milk from your breasts without pumping for too long, which can lead to oversupply and uncomfortable conditions like mastitis.
Ending Your Session & Storing Your Milk
Check in with yourself before you power down. Do your breasts feel sufficiently empty? If not, you might want to pump for a minute longer.
When it’s time to end your session, you’ll want to make sure that you remove your pump from your bra carefully to avoid spills and ensure that any milk left in the flange tunnel has trickled into the container.
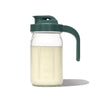
If you’re not immediately pouring your milk into a bottle and feeding your baby, have a plan for how you’ll transfer it into a cooler bottle or storage bag. You’ll also want to read up on storage guidelines and thawing instructions to know how long your milk can safely remain in the fridge or freezer.
Washing Your Pump Parts
Every time you pump, your breast pump comes into contact with your milk’s bacteria and other pathogens. This is totally natural — but if your breast pump isn't cleaned on a regular basis, these tiny microorganisms can multiply and grow over time, posing a risk of contamination. Not cleaning your breast pump can also lead to the buildup of milk residue and shorten the life of the pump itself.
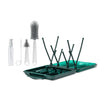
To clean your pump, you’ll want to follow the manufacturer’s instructions, paying attention to whether or not parts are dishwasher-safe or need to be rinsed with warm, soapy water. Once they’ve been cleaned, lay them out on a drying rack (like our Travel Cleaning Pack) or a clean towel. You should also lightly wipe down the surface of the pump with an antibacterial wipe or damp washcloth.
Learn more about cleaning your pump and get step-by-step instructions here.
Tips & Tricks for Successful Pumping
Getting on a Schedule
Sticking to a pumping schedule is the best way to maintain your breast milk supply and put some structure around your pumping routine. While it may feel overwhelming to pump according to the clock, it will actually help things feel more manageable once you get into the swing of things!
Your pumping schedule will depend on a variety of factors, such as what your work day looks like and where you are in your breastfeeding journey. But a good goal is to pump for 15-20 minutes, or until you feel a few let downs, about as frequently as your baby eats. This will help to mimic your baby’s feeding routine, and tell your body to continue producing milk as it has been.
What you’ll want to keep in mind?
- It's better to pump more frequently than to wait too long, which could impact your supply. Once you've settled into a routine, you can see what it feels like to go for longer stretches.
- If you miss a session, stay calm and pump as soon as you're able. Better late than never! If this happens, you'll still want to pump at your next scheduled session, even if that means they'll be close together.
Here’s a sample schedule:
7 a.m. Breastfeed or pump and store for day
8:30 - 9 a.m. Commute to work
10 a.m. Pump at work
1 p.m. Pump at work
4 p.m. Pump at work
5-5:30 p.m. Commute home
5:30 p.m. Breastfeed or pump
8 p.m. Breastfeed or pump
Staying Hydrated and Nourished
Making an effort to stay nourished and hydrated will go a long way. Your body needs adequate calories to keep up with milk production — and since breast milk is composed out of mostly water, your body will need extra hydration the entire time that you’re nursing and pumping.
Resist the temptation to skip meals when you're running from meeting to meeting. Eat a balanced lunch, prioritize protein, and make sure to keep snacks on hand!
When it comes to drinking water, pay attention to how often you need to use the bathroom and the color of your urine. If you're thirsty, you're likely already dehydrated! Setting a timer that reminds you to refill your water bottle can help.
Minimizing Stress
Beyond focusing on your sleep, there are many other ways to manage stress and give yourself the best chance at optimal milk production.
Getting in the habit of grounding yourself when you’re feeling anxious — whether through a 10-minute meditation, stretching, rolling out your yoga mat, or simply taking a few deep breaths — can help lower your cortisol levels before a feeding session.
You can also try and create a relaxing environment when nursing or pumping by lowering the lights, lighting a candle, turning on a calming playlist, or having a favorite cup of tea within reach. These little things make a huge difference when you’re feeling tired, anxious, or overwhelmed — emotions common during the postpartum period.
Troubleshooting Common Breast Pump Issues
Low Milk Supply
If you’ve just begun using your pump and are concerned about your output, take the time to measure your nipple and experiment with new flange and insert sizes. Moms often think that they have an issue with their supply, when in reality they just needed to address an ill-fitting flange! Learn more about finding your size here.
If you notice a sudden change in your supply, you can try to thoroughly wash your parts to remove any leftover milk residue, or swap out your parts for new ones. You should be replacing them every 90 days, or whenever you notice signs of wear and tear, for optimal output! Here’s what you need to know about your breast pump replacement parts.
Still struggling once you’ve ticked those boxes? It may be time to try a method called power pumping.
Power pumping is simple. Over the course of an hour, you'll pump for a period of time and rest for a period of time until you reach the 60-minute mark. Usually, this looks like an initial 20-minute pump, followed by 10 minutes off and ten minutes on.
How to power pump:
- Pump for 20 minutes
- Rest for 10 minutes
- Pump for 10 minutes
- Rest for 10 minutes
- Pump for 10 final minutes
Pain and Discomfort
Beyond impacting your output, a flange in the wrong size can contribute to discomfort while pumping. So this is the first thing you’ll want to troubleshoot if you start to feel breast or nipple pain.
In addition, there are a number of conditions — from plugged ducts to mastitis — that are very common in the early postpartum days and can make pumping and breastfeeding difficult. The good news is that these are usually easy to treat with the right tools, which include products like silver nursing cups (which are naturally anti-inflammatory and anti-bacterial) and breast therapy packs (which can help reduce swelling and support letdown through the application of ice and heat).
You can learn more about these issues here and shop some of these tools in our Find Your Flow Feeding Kit.
Pump Successfully with Willow
In this article, we walked through proper pump usage, how to make the most out of your pumping sessions, and what to do when you encounter issues related to your supply or comfort. Here’s a recap:
- Choose a pump that works for your lifestyle
- Make sure that your pump is properly assembled
- Master your pump’s stimulation and expression modes for optimal milk output
- Make sure that you’re using the right-size flange (based on your nipple measurements) and a bra that’s snug but stretchy, especially if you are struggling with supply or dealing with discomfort
- Clean your parts thoroughly after your session and replace your parts frequently
- Read up on milk storage and thawing guidelines to avoid contamination
Remember that you can always connect with a lactation consultant for support while pumping. Ask your OBGYN for a recommendation or find a provider through a network like SimpliFed. (If you’re pumping with Willow, don’t forget to take advantage of our Mom Coaches — they’ve been trained on all things Willow and can help you make the most out of your sessions!)
If you’re still looking for a breast pump, explore the hands-free, hospital-grade, app-controlled Willow Go (the pump optimized for comfort and output) and Willow 360 (the only pump that’s 100% leak-proof in any position). You can also find more pumping resources here.
Breast Pump FAQs
- To properly assemble a breast pump, ensure all parts are securely in place, including the flange, valve (duckbill), and diaphragm to create suction and prevent leakage. Proper assembly ensures effective milk extraction and reduces the risk of decreased suction.
- Position the flange so it is centered over your nipple without causing discomfort. Your nipple should move freely in the flange tunnel, and if there is rubbing or pain, try adjusting the flange size for a better fit.
- To maintain your milk supply, pump every 3-4 hours for about 15-20 minutes, mimicking your baby’s feeding schedule. Staying hydrated, nourished, and pumping regularly helps signal your body to continue producing milk.
Related Articles: