Picture this:
You receive your Willow Pump fully assembled and beautifully packaged. Excited to use it, you take it apart, wash and sanitize your parts and then lay them out to dry while your pumps charge.
Once your pumps have charged, you walk over to the assortment of parts and realize you have no idea what any of these parts are, never mind how to assemble them, and your manual has seemingly vanished off the face of the planet.
Have no fear! We are here to remind you of the simple process of assembling your Willow Pump!
Willow 3.0: Parts & Assembly
The Willow 3.0 is is designed for easy assembly with four simple steps and dishwasher-safe pump parts! The Willow 3.0 offers a fully in-bra fit and 360 leak-proof mobility, allowing you to move however you need while pumping.
Before we walk through assembly, let’s get familiar with the Willow 3.0 pump parts:
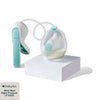
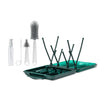
Your Willow 3.0 comes with 2 pumps, 2 flanges, 2 flextubes, spill-proof milk bags, a charging cable and cleaning brushes. Out of all of the parts included, you only have to wash two –and they are both dishwasher-safe!
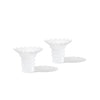
It is important to note that the flange size you choose is based on your nipple size. If your nipples require a size outside of the standard two, you have the option to purchase sizing inserts.
Now, we know that sizing can be tricky, so we’ve come up with a solution: the Willow Perfect Fit Bundle. With the Willow Perfect Fit Bundle, you receive a bundle including four sizing inserts accompanied by a 30-minute virtual fit session with one of our Sizing Specialists.
For a reusable option, you have the option to purchase the milk containers and milk container inserts! These replace the need for milk bags and can be washed and reused until there are signs of wear and tear or until 3-6 months have passed, whichever comes sooner.
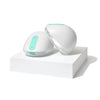
Willow 360™ Wearable Breast Pump
Willow 360™ Wearable Breast Pump
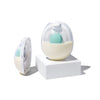
Willow 360 is designed with a zero-gravity latch to give you 360° of leak-proof mobility. It's the hands-free breast pump that changed the game.
Willow 3.0 Assembly
The Willow 3.0 was designed for busy moms. We know that you don’t have the time to sit and figure out a complicated assembly process. And we don’t want you to! In four steps, you will be ready to pump while carrying on about your day.
-
Connect the Flextube™ to the flange.
- Push the Flextube™ tip all the way down onto the flange spout.
- Then, slide the Flextube™ collar into the top of the flange. You should hear a click.
-
Attach the milk bag.
- Slide the flange door by pushing the blue thumb pad in and sliding up. Then, pull the door open.
- Drape your milk bag over the flange and make sure the writing “THIS SIDE UP” is facing away from the flange.
- Firmly press your milk bag valve onto the Flextube™ collar.
-
Close the flange door.
- Press the center of your milk bag into the deepest part of the flange and tuck the edges under the tabs.
-
Connect flange to the pump: Align the bottom tab into the slot on your Willow.
- Snap the two parts together, starting at the bottom and closing at the top. Now, you’re ready to go!
Willow Go: Parts & Assembly
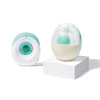
The Willow Go is designed for easy assembly with five simple steps and 6 dishwasher-safe pump parts! The Willow Go offers a fully in-bra fit, providing discreet, hospital-grade pumping.
Your Willow Go comes with 2 pumps, 2 container bowls, 2 duckbill valves, 2 diaphragms, 2 container backs, and 2 sets of flanges.
It is important to note that the flange size you choose is based on your nipple size. If your nipples require a size outside of the standard two, you have the option to purchase sizing inserts.
Now, we know that sizing can be tricky, so we’ve come up with a solution: the Willow Perfect Fit Bundle. With the Willow Perfect Fit Bundle, you receive a bundle including four sizing inserts accompanied by a 30-minute virtual fit session with one of our Sizing Specialists.
Willow Go™ Wearable Breast Pump
Willow Go™ Wearable Breast Pump
With hospital-grade suction and a 100% comfort rating, Willow Go pumps quietly and discreetly (no dangling tubes, bottles, or external motors) so you can do it all.
Willow Go Assembly
The Willow Go is designed for fast and easy assembly. So easy, in fact, you can assemble it with one hand. In five quick steps, you will be ready to pump while playing and snuggling your little one(s).
- Push the duckill onto the container back, being sure to align the tab on the container with the notch in the duckbill.
- Press the container back into the container bowl, aligning the tabs at the bottom of each.
- Press the diaphragm, extended side down, into the pump, and align the notches of the diaphragm with the tabs along the pump.
- Press the fully assembled container onto the pump and diaphragm until it clicks into place.
- Press the flanges into the assembled pump.
Willow Pump Troubleshooting
Even though we’ve designed our pumps with ease in mind, sometimes things happen!
Don’t worry, we’ve got you covered with our Willow Go and Willow 3.0 Troubleshooting Guides! Here you will find the answers to popular issues, videos, and resources for using your pump correctly and efficiently!
If you can’t find the answer to your problem there, please don’t hesitate to reach out to our Willow Care Mom Squad!
